Having a hard time highlighting and contouring? Don’t panic, this is the perfect guide on how to contour & highlight using concealers!

This post may contain affiliate links. Meaning that any clicks/purchases may result in a small commission to keeping Beauty With Lily running at no additional cost to you.
Are you into highlighting and contouring? Too scared to give it a try? It’s actually not as scary as it looks — and I hope the following tips help you get out of your comfort zone and try something new with your makeup.
How To Contour & Highlight
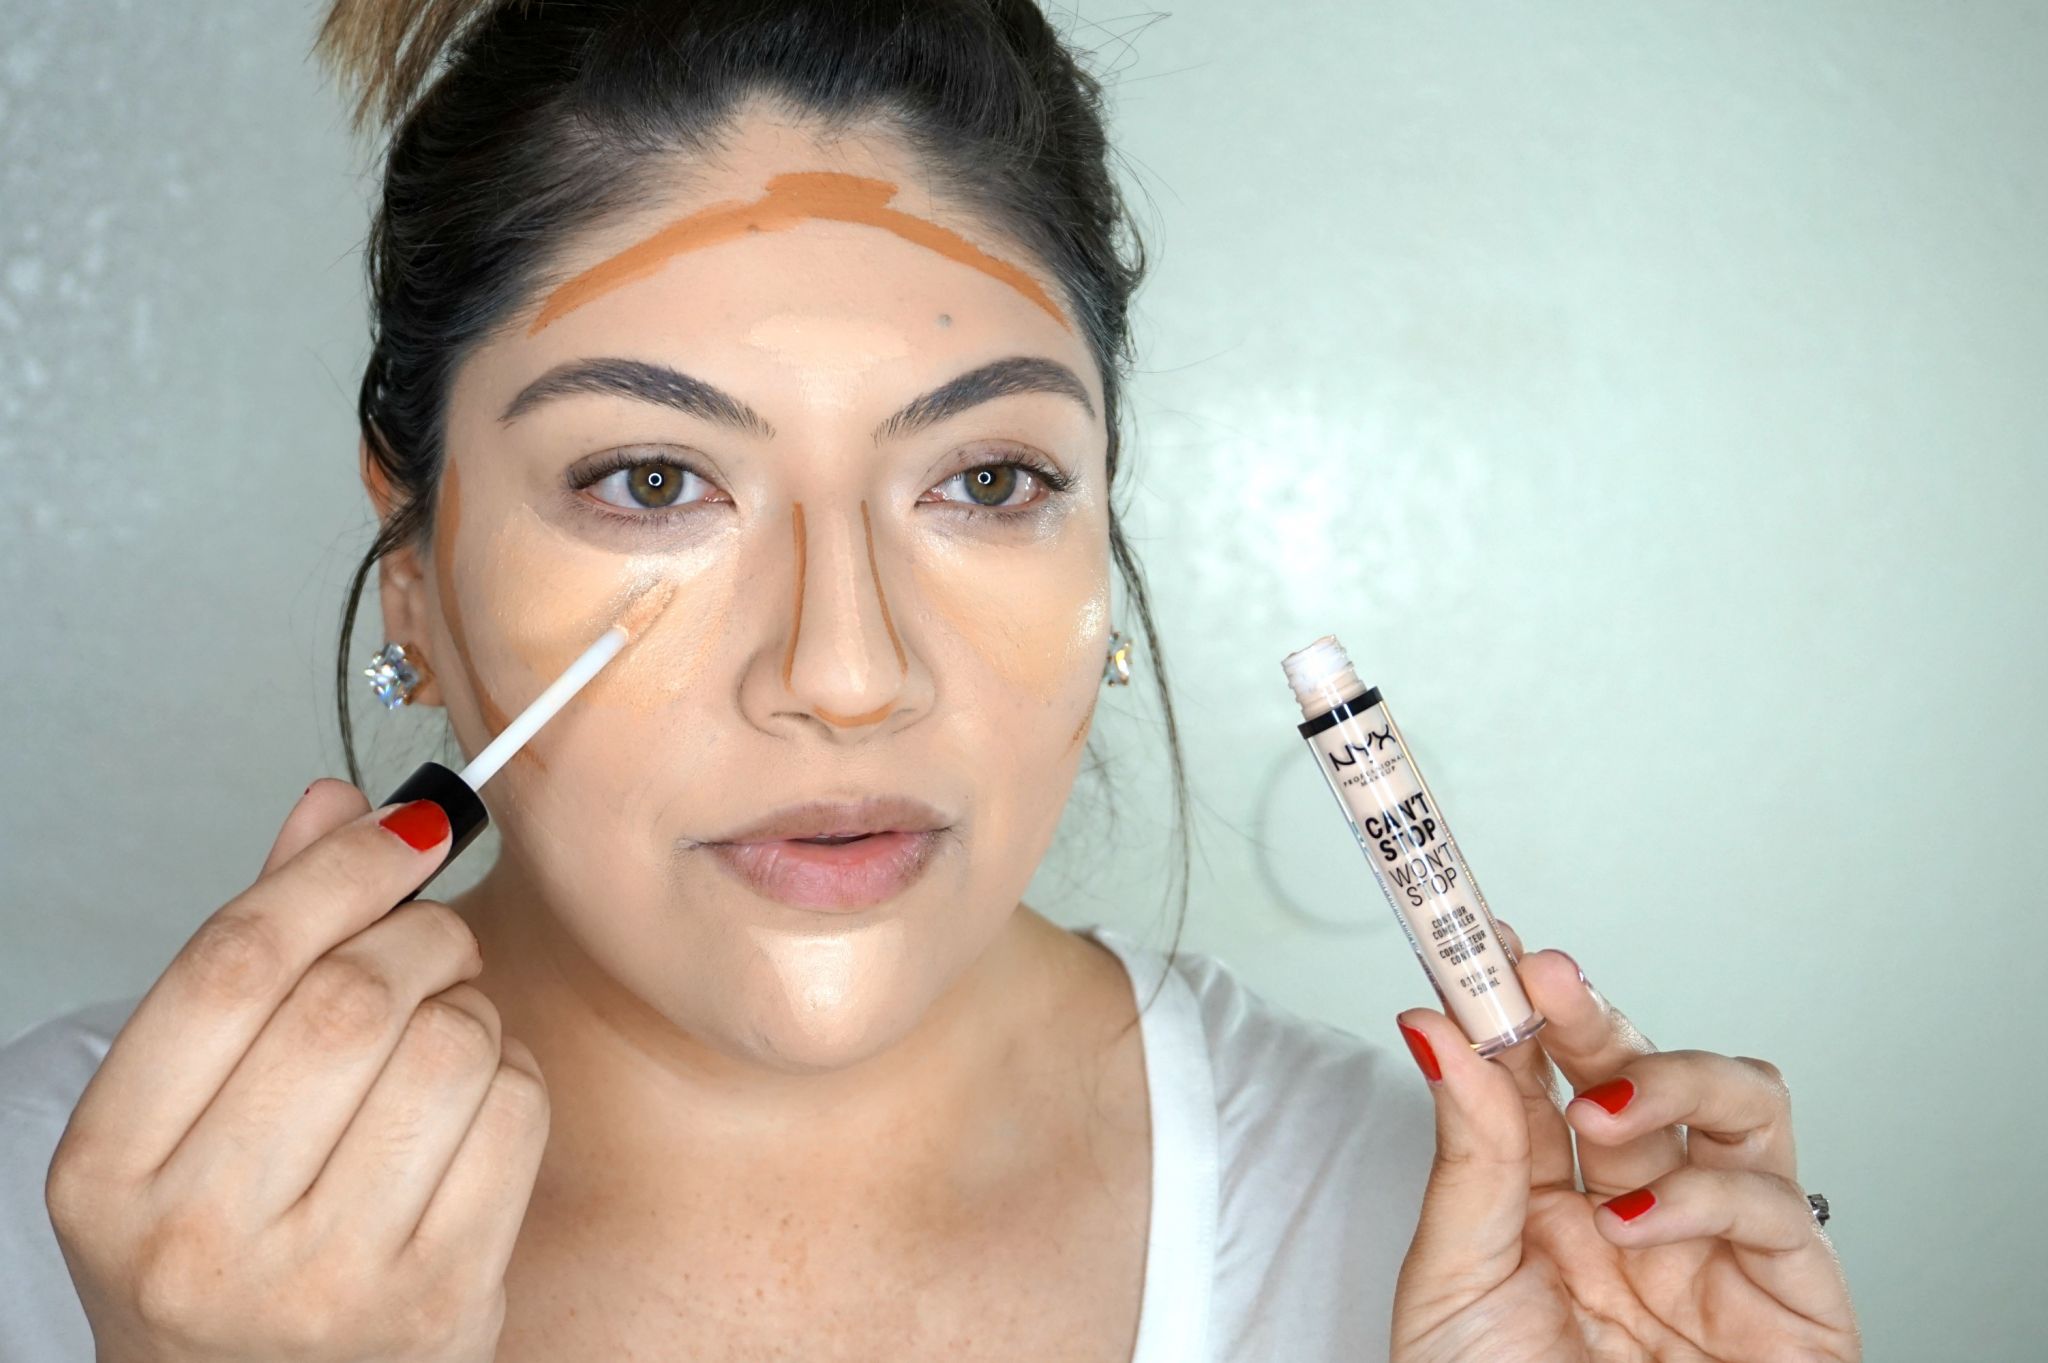
I am not one to contour & highlight on the daily, because let’s be real, nobody has time for that! But for special occasions, it’s nice to spend the extra time to perfect my makeup look and go the extra mile. Recently I’ve been playing around with liquid H&C and I definitely like it more than I thought I would — the NYX Can’t Stop Won’t Stop Concealers make it so easy!

After you’ve applied your foundation, start by adding in a shade that is about 3 shades darker than your skin. Adding darker colors to certain areas of the face creates shadows, which help define the face and give it more shape. Add the darker shade to the tops of your forehead, temples, sides of your nose, below your cheekbones and your jaw line.
- Tip: Choose a darker shade that is not too orange or warm, you want something neutral. *In other words, don’t be like me — lol — these were the shades that were sent to me.*

By adding lighter shades, you are making the area appear more prominent and enhancing it. If you have areas that need color correcting, make sure you do this before highlighting and contouring — especially around the eye area.

Keep in mind that the way I contour, may not work for your face shape. I found these tips below from a makeup artist that I thought were perfect to share with y’all!
“New York-based makeup artist Ashley Rebecca stresses the importance of contouring for your unique face shape. Rebecca spills her pro tips here:
- Heart shape: “Swipe your brush along the sides of your forehead near the hairline, underneath your cheekbones and in the hollows of your cheek area.”
- Oblong shape: “Start right at the top of the forehead area and on each side of the jaw, blending toward the chin.”
- Oval shape: “Add dimension underneath your cheekbones to make them appear more prominent.”
- Round shape: “Apply on the sides of your forehead, underneath your cheekbones and along the jawline.”
- Square shape: “On the sides of your forehead and below the cheekbones pointing down toward the chin.”
- Diamond shape: “The lower cheekbones, toward the chin area only.” — source

You Might Also Like // Classic Glam Makeup
Shop These Items
Having a hard time highlighting and contouring? Don't panic, this is the perfect guide on how to contour & highlight using concealers! Click To Tweet
I hope you found this helpful — I know it can seem a bit scary to try at first, but practice makes perfect!
Are you into highlighting & contouring?
Enjoyed this post? Please share it on social media and pin this post! I truly appreciate your support!


